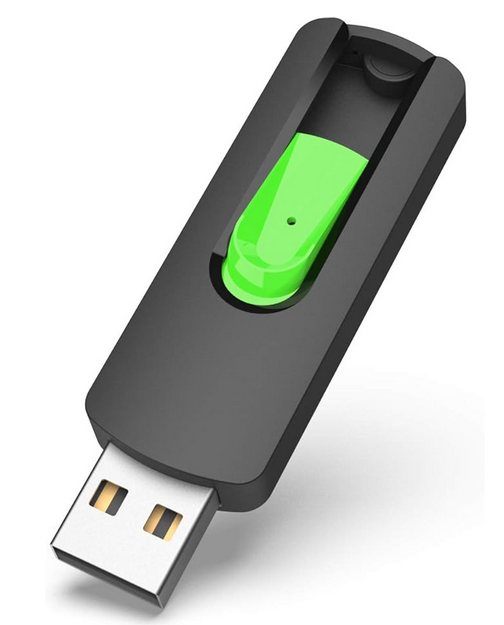
When working on your Windows PC or Laptop having a flash drive is not enough. It needs to be “bootable” where Windows will allow the flash drive to Boot the computer. Great for installing Windows, Repairing Windows, or using software like Hirens Boot CD to boot into Linux style system with a Windows user interface. So now we insert our USB Flash Drive and do the following.
- Open the command prompt or Windows Powershell
- Type: diskpart
- Type: list disk
- This will show all connected disks, their disk numbers, connection status and disk size
- Using the sizes, determine which disk is your USB drive and remember its disk number (i.e. Disk 2)
- Type the following commands: (where X is the disk number of your USB drive)
- sel dis X
- clean
- cre par pri
- active
- format fs=ntfs Quick
- exit
Once the disk is formatted and prepared, you can copy the Windows installation files onto the disk, whether this is from the DVD, ISO or a modified image.
If you want to download a program to install ISO files on a Flash drive the easiest one so far this year is Balena by Etcher. Extremely easy to use.
Key takeaways: bootable flash drive basics
A bootable flash drive lets Windows start from the USB stick so you can install or repair the system. The DiskPart steps above prepare the drive; afterward you can copy Windows files or use Balena Etcher for an ISO.
Related help on this site: how to remove read only on an SD card and fix an HP Stream boot loop. For DiskPart details, Microsoft documents the tool at learn.microsoft.com.
The easiest option for Windows: Microsoft’s Media Creation Tool
If all you need is a Windows 11 or Windows 10 installer, Microsoft’s free Media Creation Tool is the simplest route. Download it from Microsoft’s official Windows download page, run it, choose “USB flash drive,” and pick your drive. It downloads Windows and makes the drive bootable in one go. You need a drive of at least 8GB, and everything on it will be erased.
Legacy BIOS vs. UEFI: why some USB drives will not boot
The DiskPart steps above format the drive as NTFS and mark the partition “active,” which is what older computers with a legacy BIOS look for. Most computers made in the last ten years boot in UEFI mode instead, and many UEFI computers can only boot from a FAT32 drive. If your computer skips right past the USB drive, that is the most likely reason. Three fixes:
- Use the Media Creation Tool, which handles UEFI automatically.
- Use the free tool Rufus. Choose your ISO, set the partition scheme to GPT for UEFI computers or MBR for older ones, and let Rufus handle the rest.
- If you stick with DiskPart for a UEFI computer, replace
format fs=ntfs quickwithformat fs=fat32 quick. Newer Windows ISOs contain a file larger than FAT32’s 4GB limit, which is why the first two options are easier.
A note about Balena Etcher
Etcher is great for Linux ISOs, Raspberry Pi images and rescue tools, and it is very hard to mess up. Windows install ISOs are a different story. They often do not boot correctly when written with Etcher, so use the Media Creation Tool or Rufus for Windows and keep Etcher for everything else.
How to boot from the flash drive
Plug in the drive, restart, and tap the boot menu key right after the power comes on. Common keys are F12 on Dell, Lenovo and Acer, F9 or Esc on HP, F8 or Esc on ASUS, and F11 on many desktop motherboards. Pick the entry with your USB drive’s name. If it is not listed:
- Try a different USB port. Ports directly on the computer work better than hubs.
- Enter BIOS setup and make sure USB boot is enabled.
- If you are booting a tool that is not signed for Secure Boot, you may need to turn Secure Boot off temporarily. Turn it back on when you are done.
- On Windows, you can also hold Shift while clicking Restart, then choose Use a device.
What to keep on a rescue drive
A bootable drive is cheap insurance. A good kit is a Windows installer made with the Media Creation Tool, plus a second drive with a rescue environment like Hiren’s BootCD PE for copying files off a computer that will not start. Label them and keep them with your laptop bag or tool box. If you ever face a laptop stuck restarting, like the HP Stream in my HP Stream boot loop fix, you will be glad you made one ahead of time.
Common mistakes to avoid
- Selecting the wrong disk in DiskPart. The
cleancommand wipes the selected disk instantly. Unplug other external drives first so the only small disk on the list is your flash drive. - Using a tiny or very old drive. Windows installers need at least 8GB. Old, slow drives can take an hour or fail partway through.
- Copying the ISO file itself onto the drive. Dragging the .iso file over does not make a bootable drive. You have to extract it, or let a tool like Rufus or the Media Creation Tool write it.
- Forgetting to back up first. Making a drive bootable erases it. Copy off anything you want to keep.
Related reading on Pages of Wisdom
- How to reset fix HP Stream in endless loop of not booting to windows.
- How to Remove Read Only on a SD Card
- Your Printer Isn’t Broken. Windows’ November Update Is Tripping Over Invisible Pictures. Here’s the Fix
- Microsoft Paint Just Got a Security Fix, and Windows Update Won’t Install It for You
Helpful gear
A few related products worth knowing about. As an Amazon Associate I earn from qualifying purchases.
- SanDisk Ultra Fit 128GB USB flash drive — A tiny USB stick useful for installers, recovery media, and file swaps.
FAQ
Do I need a bootable flash drive just to store files? No. You only need a bootable flash drive when you want the PC to start from that USB for install or repair work.
Is Etcher required? No. DiskPart prepares the drive; Etcher is an easier option if you are writing a full ISO image.

More Stories
Hackers Used GL.iNet’s Own Cloud to Break Into Travel Routers. Here’s the 20-Minute Check Every Owner Should Do
The Container Store Got Hacked Days Before Black Friday. Here’s the 10-Minute Saved-Card Cleanup Every Shopper Should Do
Scammers Can Clone Your Kid’s Voice From a 3-Second Clip. Pick a Family Code Word Before the Pie Comes Out